Deploying HCX Appliances
- Mohammed Bilal
- Aug 15, 2024
- 4 min read
Recently I completed my training on HCX and thought of sharing my knowledge with the wider technical community.
This and the upcoming blogs will share the steps from the start (Deploying of the HCX appliances) to the end (Different types of migration)
Note: I have tested the migration between On-prem to On-prem, but HCX is not limited to on-prem HCX can be used for migration between On-Prem to Cloud, and Cloud to Cloud,
You use separate OVA files to deploy HCX Connector and HCX Cloud site managers.
To access HCX Services, you must install the HCX Connector OVA at the source site for mobility operations and the HCX Cloud Manager OVA at the destination site.
If operations are between two cloud sites, you install the HCX Cloud Manager OVA at both sites.
For private cloud deployments, you download the OVAs from the Broadcom support site. From the downloads site, you select the latest version of the HCX Connector and HCX Cloud Manager OVAs.
For my current setup, I had to deploy below two HCX appliances in the vSphere environment,
HCX Connector - Is always deployed as the source
HCX Cloud - This is typically deployed as the destination, but it can be used as the source in cloud-to-cloud deployments. In HCX-enabled public clouds, the cloud provider deploys HCX Cloud.
Apart from the above two primary HCX components, other important HCX components (mentioned below) will be deployed during the HCX configuration:
HCX-IX Interconnect Appliance - The Interconnect service (HCX-IX) appliance provides replication and vMotion-based migration capabilities over the Internet and private lines to the destination site while providing strong encryption, traffic engineering, and virtual machine mobility.
The Interconnect appliance includes deploying the Mobility Agent service that appears as a host object in the vCenter Server. Mobility Agent is the mechanism that HCX uses to perform vMotion, Cold, and replication-assisted vMotion (RAV) migrations to a destination site.
WAN Optimization Appliance - The WAN Optimization (WAN-OPT) appliance improves performance characteristics of the private lines or Internet paths by applying WAN optimization techniques like data de-duplication and line conditioning.
Network Extension Appliance - The Network Extension (IX-NE) appliance provides layer 2 connectivity between sites. Network Extension allows keeping the same IP and MAC addresses during virtual machine migrations. When the Network Extension service is enabled, a pair of virtual appliances is deployed: one in the source and one in the destination site.
Sentinel Gateway Appliance - Using OS Assisted Migration (OSAM) service, you can migrate guest (non-vSphere) virtual machines from on-premise data centers to the cloud. The OSAM service has several components: the HCX Sentinel software that is installed on each virtual machine to be migrated, a Sentinel Gateway (SGW) appliance for connecting and forwarding guest workloads in the source environment, and a Sentinel Data Receiver (SDR) in the destination environment.
HCX Sentinel Data Receiver Appliance - The Sentinel Data Receiver (SDR) appliance works with the HCX Sentinel Gateway appliance to receive, manage, and monitor data replication operations at the destination environment.
I know most of you are aware of how to deploy an OVF appliance on the vSphere environment, but still will outline the steps here for beginners:
Use this procedure to deploy the downloaded HCX Connector and HCX Cloud Manager OVAs using a standard OVA template installation through the vSphere Client.
Procedure to Deploy HCX Connector appliance:
Log in to the vSphere Client.
Right-click any inventory object that is a valid parent object of a virtual machine (such as a data center, folder, cluster, resource pool, or host) and select Deploy OVF Template.
On the Select, an OVA template page, click on or browse to a local file location accessible from your computer and click Next
On the Select a name and folder page, enter a unique virtual machine name and the inventory location and click Next.
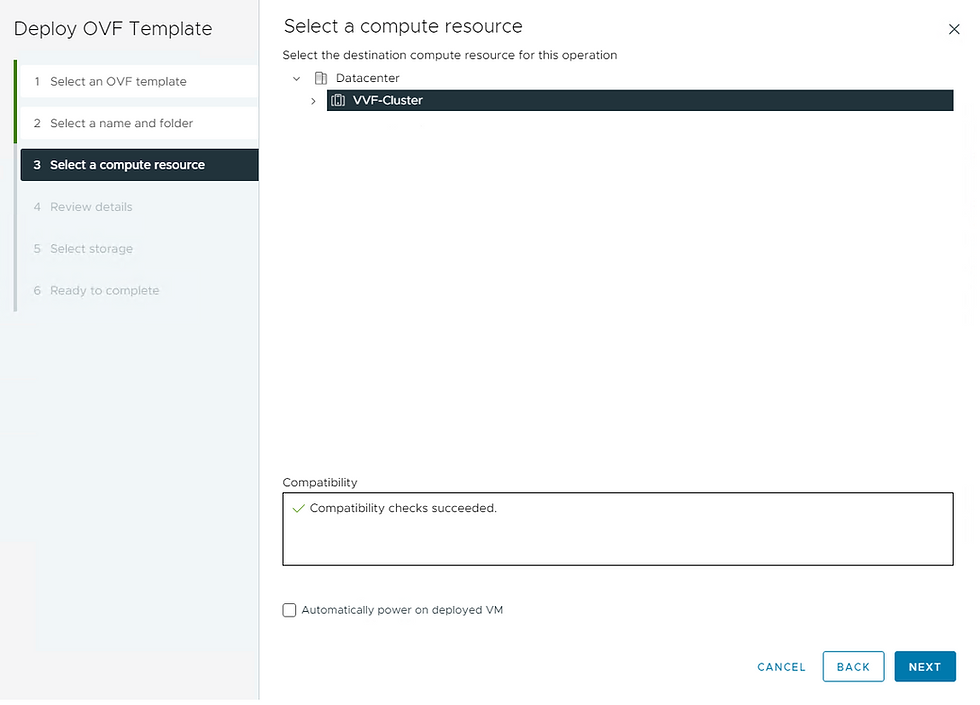
On the Select a compute resource page, select a compute resource location and click Next.
On the Review details page, verify the OVA template details, and click Next.
On the License agreements page, read and accept the VMware End User License Agreement, and click Next.
On the Select storage page, select the virtual disk format, storage policy, and storage name, and then click Next.
On the Select networks page, select the destination network, and click Next.
On the Customize Template page, set the appropriate deployment properties:
Passwords - Configure the CLI admin password and the root user password.
Network Properties - Enter the network properties for the default gateway.
Static Routes - Add a static route for a destination subnet or host.
DNS
DNS Server List - Enter the list of DNS servers for this virtual machine.
Domain Search List - Domains that you enter are searched in the order you list them, and the search stops when a valid name is found.
Services Configuration
NTP Server List - Enter the list of NTP servers and ensure that the NTP server can be reached from the virtual machine. If the NTP time is out of sync, services fail to start.
Deployment (Connector OVA installation only)
Click Next.
Review the deployment settings and click Finish.
The OVA deployment will take a few minutes for the deployment and once the deployment is completed you can power on the VM.
Follow the same steps on the other (Target) vCenter to deploy the HCX cloud OVA.


Comments